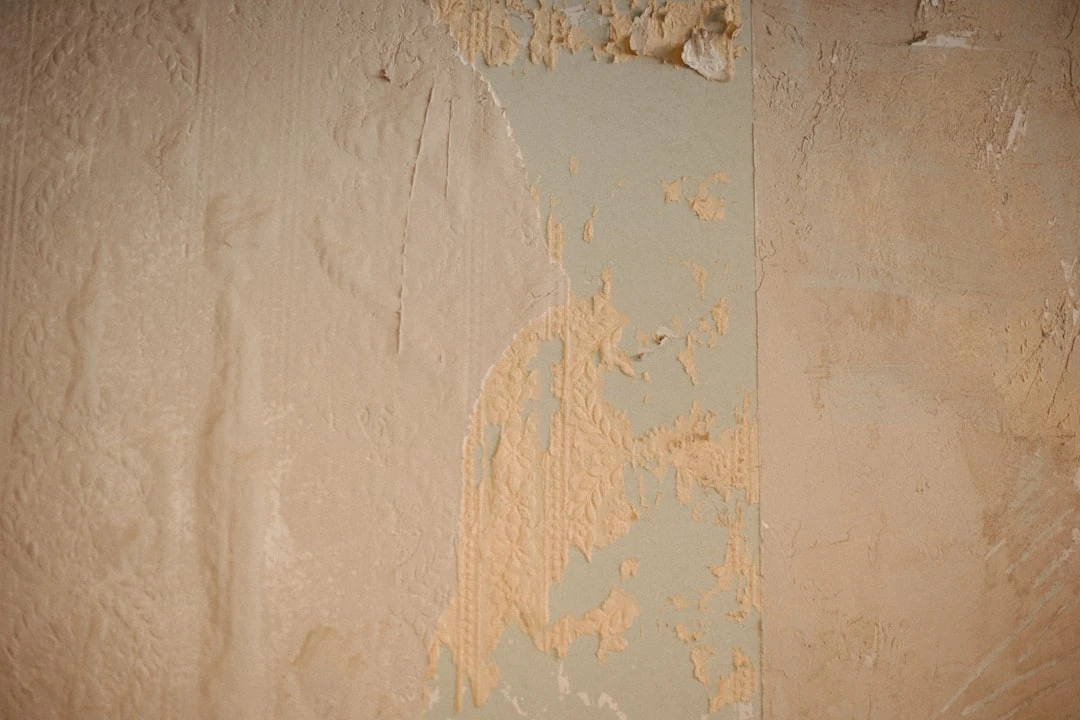
How to Safely Remove and Strip Old Wallpaper

Removing old wallpaper is an important part of a renovation project if you want to refresh a room or discover problems hidden beneath the wallpaper. The right methods help you complete the work efficiently and without damaging the walls. We share detailed instructions on how to remove wallpaper safely and what tools and materials to use.
Preparation before wallpaper removal
Before removing wallpaper, there are important preparatory steps that ensure a smoother process and prevent damage:
Protect the room thoroughly – cover the floor and furniture with protective sheets. Wallpaper removal is a wet and messy job, so it's worth removing valuable items from the room or covering them properly.
To ensure safety, turn off the electricity in the room you're working in, especially if you're using water or a steam cleaner. This prevents the risk of electric shock.
Prepare the necessary tools:
Wallpaper perforator or scoring tool
Wallpaper removal solution or water-vinegar mixture
Steamer (if available)
Wide scraper (putty knife)
Rubber gloves and safety glasses
Ladder (if needed)
Spray bottle
Before starting large-scale work, test the chosen method on a small, less visible area. This way, you can determine which approach works best for your wallpaper and wall.
Determining wallpaper type
Different types of wallpaper require different approaches:
Paper wallpaper absorbs water well and is usually the easiest to remove. Vinyl wallpaper has a water-resistant top layer that needs to be perforated. Textured wallpaper requires more careful perforation, while multi-layer wallpaper must be removed one layer at a time. Painted wallpaper requires more thorough perforation and a stronger solution.
If you're unsure what type of wallpaper you have, try removing a small piece in the corner. If it comes off easily, it's likely paper wallpaper. If the top layer comes off but the bottom stays on the wall, you're probably dealing with vinyl or textured wallpaper.
Step 1: Perforating the wallpaper
Perforation is an important step, especially for vinyl wallpaper, as it allows moisture to penetrate under the wallpaper and soften the adhesive layer.
Use a wallpaper perforator, which is a specially designed tool for making small holes. Alternatively, you can carefully use a knife or scissors to make incisions.
Make perforations every couple of centimeters, using even but not excessive pressure to avoid damaging the wall. Perforation should be done gently but thoroughly.
The perforation technique is especially important if the wallpaper is covered with paint or if you're dealing with vinyl wallpaper that doesn't allow moisture through.
Step 2: Moistening and soaking the wallpaper
Once the wallpaper is perforated, it's time to moisten it so the adhesive starts to dissolve:
Prepare the solution – a standard solution is 1 liter of warm water and 2 tablespoons of vinegar. For stronger adhesive, use 2 parts water to 1 part vinegar.
Apply the solution to the wallpaper using a spray bottle for smaller areas or a brush/roller for larger surfaces. Apply the solution generously, starting from the top and moving downward.
Let it soak for at least 10-15 minutes. For thicker wallpaper or stronger adhesive, the solution may need to work longer, even up to 30 minutes.
The solution softens the adhesive and makes wallpaper removal much easier. Using vinegar helps dissolve the adhesive better and is an effective and environmentally friendly alternative to chemical solutions.
Step 3: Steaming the wallpaper
Steaming is an effective method, especially for difficult-to-remove wallpaper:
Fill the steamer according to the manufacturer's instructions and hold the steamer head against the wallpaper for about 10 seconds until it becomes moist. Move systematically from one area to another.
Be careful – don't hold the steamer in one place for too long, especially on drywall. Wear gloves to avoid burns, and ensure the room is well ventilated.
Steaming is particularly effective for thick or multi-layer wallpaper. However, be careful not to over-saturate drywall, as excessive moisture can damage it.
Step 4: Removing the wallpaper
Once the wallpaper is sufficiently moistened or steamed, it's time to remove it:
Start from the corner or edge of the wallpaper. Hold the scraper at a low angle to avoid damaging the wall. Move gradually, trying to remove wallpaper in the largest pieces possible.
If the wallpaper doesn't come off easily, moisten it again. For particularly difficult areas, you may need more perforation and longer soaking time.
For multi-layer wallpaper, you may need to remove the layers separately. Usually, the top layer comes off more easily than the bottom adhesive layer.
While scraping, keep the tool at the right angle and use appropriate pressure to avoid damaging the wall, especially drywall. If you notice the wall surface starting to get damaged, adjust your technique to be gentler or moisten the wallpaper more.
Step 5: Removing adhesive residue
Once the wallpaper is removed, there may be adhesive residue left on the wall that must also be removed:
Adhesive residue feels sticky or shiny on the wall and when dry can become dusty or rough.
Spray the wall with a warm water and vinegar solution, let it work for a few minutes, then gently scrape using a wide scraper.
For stubborn adhesive residue, enzyme-based wallpaper removers work well – they're effective and non-corrosive. Citrus solutions also work well and are environmentally friendly.
After removing adhesive residue, wash the wall with clean water to remove any cleaning product residue, and let the wall dry thoroughly before starting further work.
Preparing walls after wallpaper removal
Once the wallpaper and adhesive residue have been removed, it's important to properly prepare the walls before installing new finishes:
Clean surfaces thoroughly – wash the walls with warm water and neutral detergent, rinse with clean water, and allow to dry completely (at least 24 hours).
Repair minor damage – fill smaller holes and cracks with filler. For larger repairs, you may need reinforcing mesh, as explained in our wall repair guide. Sand the patched areas smooth.
Prime the surface – apply an even primer coat to the wall, which helps new finishes adhere better and ensures even absorption. Let the primer dry completely according to manufacturer's instructions.
Proper surface preparation is essential to ensure new wallpaper or paint adheres evenly and lasts longer. Proper wall preparation is especially important when refreshing the bathroom, where humidity levels are higher.
Ensuring safety during wallpaper removal
Wallpaper removal may seem simple, but it involves certain risks you should be aware of:
Use personal protective equipment – safety glasses to protect your eyes from loose wallpaper and solutions, gloves, especially if using chemical solutions, and a dust mask, especially with old wallpaper.
Ensure good ventilation – open windows and use fans, especially if using chemical wallpaper removers.
Follow electrical safety – turn off electricity in the room you're working in and be especially careful around outlets and switches.
Use a ladder or platform safely – make sure the ladder is installed stably, and don't stretch too far; move the ladder as needed.
Following these safety measures helps prevent accidents and ensures the wallpaper removal process goes smoothly.
Recommendations for solving different problems
Wallpaper removal can present various challenges that require different approaches:
For multi-layer wallpaper, remove one layer at a time, avoid over-saturating the wall, and perforate each layer separately if needed.
Very old wallpaper may require longer soaking time. Use gentler scraping technique and for very delicate walls, consider contacting professionals.
Painted wallpaper requires more thorough perforation, stronger removal solution, and longer soaking time.
If you discover wall damage, especially mold, stop work and consult a specialist. Repair small damage with filler, following our instructions for repairing holes. For extensive damage, you may need to consult a construction expert.
Understanding different challenges and knowing how to handle them makes wallpaper removal much easier and more efficient.
Required tools and materials
The right tools make wallpaper removal significantly easier:
Basic tools include a wallpaper perforator/scorer, a wide scraper/putty knife (preferably plastic to avoid scratching walls), a spray bottle for applying solution, and brushes and cloths.
Materials you'll need include vinegar or specialized wallpaper remover, protective sheets for floors and furniture, painter's tape for securing protective sheets, and old newspapers or paper towels for collecting wet wallpaper.
Protective equipment includes rubber gloves, safety glasses, dust mask, and rubber boots or waterproof footwear.
Additional equipment may include a ladder for safe work at heights, a steamer (available for rent from hardware stores), and extended-handle scrapers for high ceilings.
During home renovation, using quality tools is an investment that pays off in smoother work and better results.
Summary
Wallpaper removal can be time-consuming, but with the right methods and tools, it's a completely doable home project. Thorough preparation, proper technique, and patience are key factors in achieving successful results.
Once you've finished removing the wallpaper, you can choose from various finishing options – whether that's installing new wallpaper, painting, or another solution.
If the project seems too complicated or extensive, you can always contact professionals. On the Kinnisvara24 portal, you'll find reliable information on both home renovations and updates, so your home is always in its best condition.
Search
Keywords
Most read articles
- Price per Square Meter of Apartments in Tallinn in 2025

- Estonian Apartment Prices and Market Expectations in 2025
- Apartment Market in Early 2026: Prices Rising, Transaction Activity Remains Modest

- Notary Fee and State Fee – Who Pays and How Much?
- The Apartment Market in Estonia's Largest Cities in 2025
